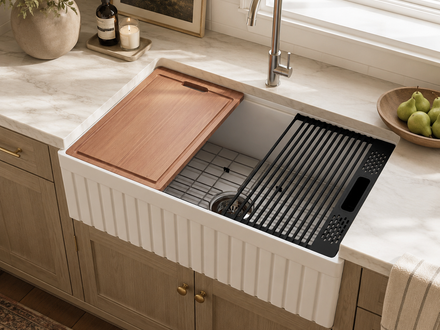
Farmhouse Sink with Butcher Block Countertop: Installation, Sealing and Design Guide

A white farmhouse sink and a warm wood counter can work in rustic, transitional or modern kitchens. The challenge is not making the materials look good together. It is protecting the wood around a large, frequently wet sink opening.
A farmhouse sink with butcher block counter can perform well when the cabinet supports the basin, the counter is cut from the actual sink dimensions and every newly exposed wood surface is sealed before installation.
Can You Install a Farmhouse Sink with Butcher Block?
Yes. You can install butcher block with a farmhouse sink—also called a farm sink or apron-front sink—provided the cabinet carries the sink’s weight and all exposed wood around the opening is properly sealed.
The butcher block countertop surrounds the basin, but it should not serve as the structural support for a heavy fireclay sink.
Why Butcher Block Changes the Installation Plan
Butcher block is a wood countertop made from bonded strips of solid wood. Every new cut exposes additional grain that can absorb moisture.
This makes butcher block countertops different from granite, soapstone and many engineered countertops. Wood can swell or shrink as its moisture content changes, so the finish and sink joint must accommodate normal dimensional movement rather than depend on a permanently rigid connection.
The USDA Forest Products Laboratory’s guidance on wood and moisture explains how moisture changes can cause shrinkage, swelling, checking and distortion in wood.
Around a sink, the most vulnerable locations are usually:
- The end grain around the opening
- The narrow strip behind the sink
- Faucet and soap-dispenser holes
- Inside corners
- Seams between two pieces of butcher block
- The underside beneath the sink rim
The broad surface is not always the first area to fail. Water damage often begins where an unfinished hole, cut edge or failed joint allows moisture below the visible coat.

Before You Cut: Four Decisions That Must Be Final
Do not approve the butcher block cutout until these four points are confirmed:
- The sink is supported and level.
- The apron position has been approved.
- The countertop reveal has been selected.
- The faucet layout and rear counter space have been checked.
The apron may sit flush with or slightly beyond the cabinet face, depending on the sink, cabinets and design. Decide how far the farmhouse sink should stick out before the countertop template is finalized.
Changing any of these details after cutting may leave an uneven reveal, insufficient faucet space or an opening that no longer matches the installed sink.
Fireclay Sink Weight and Independent Support
A fireclay farmhouse sink should rest on a reinforced platform, support rails, cleats or another manufacturer-approved system inside the base cabinet.
NOZLOO fireclay sinks weigh approximately 100–115 lbs, depending on the model. Once the basin contains water, cookware and dirty dishes, the total load on the cabinet support can reach approximately 200–300+ lbs.
That weight must transfer into the cabinet structure rather than hang from the butcher block counter.
Unlike a conventional drop-in sink, a heavy fireclay sink should not depend on a top lip for structural support. Its final relationship with the counter—such as undermount, flush or another manufacturer-approved configuration—depends on the specific sink model.
Set and level the sink before templating the countertop. Use the actual sink or an approved template rather than cutting from nominal width alone. Fireclay dimensions may vary slightly, so an opening based only on a “30-inch” or “33-inch” label may not fit perfectly.
For the complete support and mounting process, see the fireclay farmhouse sink installation guide. Cabinet width and interior clearance are covered separately in the farmhouse sink cabinet-size guide.

Cutting and Sealing the Butcher Block Opening
Many undermounted apron-front layouts require a U-shaped opening at the front of the butcher block. The exact shape must follow the actual sink and its approved installation method.
A practical sequence is:
- Install the sink support.
- Set and level the sink.
- Confirm the apron position and reveal.
- Mark the opening from the actual installation.
- Test the layout on a template or scrap piece.
- Cut, sand and dry-fit the counter.
- Seal every exposed surface before final installation.
Saw and blade choice, corner-cutting method and edge-finishing technique depend on the wood species, counter thickness and installer experience. Precise fabrication should be handled by an experienced professional when the cutout exceeds the homeowner’s woodworking skill.
Seal More Than the Visible Surface
The opening creates several new surfaces, and all of them need protection:
- The top face
- Vertical cut edges
- Exposed end grain
- The underside around the opening
- Faucet and accessory holes
- Inside corners
- Wood hidden beneath the sink rim
There are two separate sealing tasks.
Seal the wood first. Apply a finish approved for wood countertops, the expected moisture exposure and—once fully cured—the intended level of food contact. Follow the manufacturer’s instructions for surface preparation, number of coats, recoat timing and full cure time.
Seal the joint second. Once the wood finish has fully cured, use compatible silicone or another specified sealant where the sink meets the counter.
Silicone closes the sink-to-countertop joint. It does not replace a proper wood sealer and cannot protect unfinished material beneath the surface.
The USDA Forest Products Laboratory distinguishes between penetrating and film-forming finishes and notes that water-repellent finishes can reduce moisture absorption during brief exposure.

Which Butcher Block Finish Route Should You Choose?
The main decision is not simply “oil or no oil.” It is whether the counter will use a renewable penetrating system or a more protective film-forming system.
| Finish route | Best suited to | Main trade-offs near a sink |
|---|---|---|
| Penetrating oil or oil-and-wax system | Owners who prefer a natural feel, simple spot maintenance and a product approved for the intended food contact | Usually requires more frequent maintenance and is less forgiving of standing water than a durable film-forming finish |
| Film-forming countertop finish | Owners prioritizing stronger resistance to repeated splashes and easier surface cleaning | The surface should be treated as a counter rather than a cutting board; scratches, peeling or local damage may require sanding and recoating |
Butcher block oil and food-grade mineral oil are commonly associated with removable cutting boards. The University of Maine Cooperative Extension recommends food-safe mineral oil or beeswax for wooden cutting boards and advises against cooking oils that can become sticky or rancid.
A fixed butcher block counter around a sink faces different conditions. It has hidden edges, faucet penetrations, caulked joints and an underside that cannot be dried as easily as a removable board.
Mineral oil may suit a counter intentionally designed around an oil-only maintenance system. It should not be applied over polyurethane or another cured coating unless the finish manufacturer specifically approves the combination.
Use one compatible finish system across the top, cutout, holes and underside. Test the full process on a scrap piece first to see how the finish changes the color, grain and sheen.
Protecting the Faucet and Sink Cutout Areas
The narrow counter space behind the sink often receives more moisture than the open food prep surface.
Water can enter around:
- The faucet base
- Handles
- Soap dispensers
- Pre-drilled holes
- The backsplash line
- The rear corners of the sink
Seal the inside of every drilled hole before installing the faucet or accessories. Follow the fixture manufacturer’s gasket or sealing instructions, and recoat any wood exposed during drilling.
Pay particular attention to the narrow strip behind the sink. It can be difficult to wipe, and water entering one faucet hole may spread beneath the visible countertop finish before discoloration appears.
Want a Farmhouse Sink with a Drainboard? The Ledge Is the Modern Version
Quick answer: skip the vintage one-piece drainboard sink. A workstation sink with a roll-up rack does the same job, drains into the bowl instead of onto your wood, and stows in a drawer when you're done.
Why One-Piece Drainboard Sinks Mostly Disappeared
The classic version had a ribbed, sloped drying deck cast into the sink body. It worked, but it had three problems — worse on butcher block than anywhere else.
- It permanently eats counter space. The deck is there every day, drying dishes or not.
- It cannot move. Cast on one side, forever — if your prep zone ends up on the other side, too bad.
- The seam against wood is longer. A wide, irregular body means more joint line — more caulk to maintain, more places for water to find.
Most drainboard sinks still sold are stainless steel or custom fabrications; fireclay versions are rare.
The Workstation Ledge Does the Same Job Better
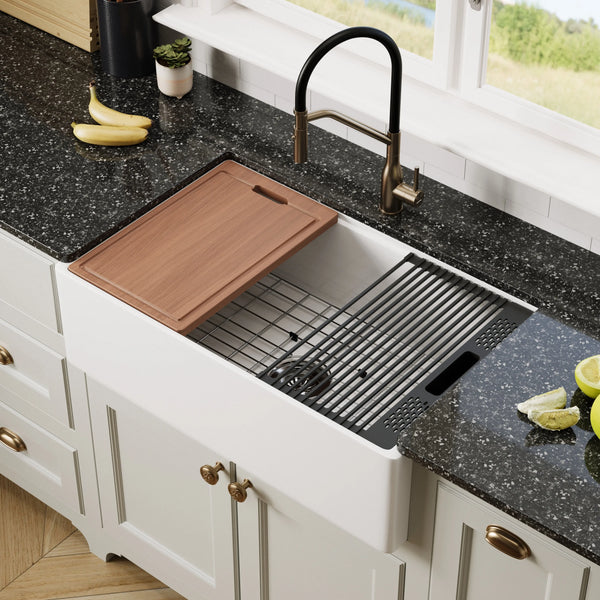
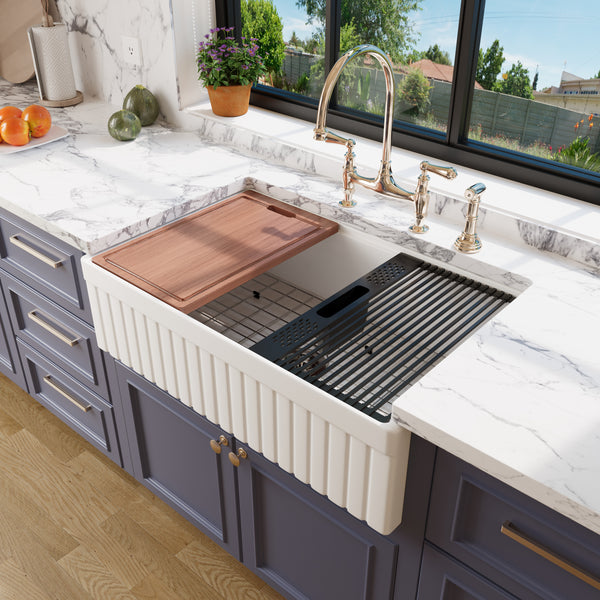
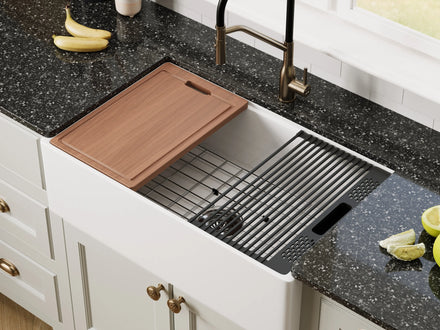
A workstation farmhouse sink has rails built into the rim. A roll-up rack sits on those rails, over the bowl — that is your drainboard. Wet plates drip straight into the basin, not onto the wood. Done drying? Roll it up, drop it in a drawer.
On a wood counter that is the whole point: standing water never touches the butcher block.
| One-piece drainboard sink | Ledge + roll-up rack | |
|---|---|---|
| Counter space used | Permanent | None when stowed |
| Where water drains | Across the deck, past a seam | Straight into the bowl |
| Drying position | Fixed at the factory | Slides along the rim |
| Butcher block joint | Long, wide-body seam | Standard cutout |
How We Use Ours
Slide the rack to one end and dry dishes while you rinse at the other. Lay a just-washed cutting board across it to air-dry over the basin. Our 30-inch and 33-inch fireclay farmhouse sinks are workstation models; the 4-piece kit in the box — roll-up rack, sliding cutting board, bottom grid — means the drainboard is included, not an add-on.
One honest limit: a roll-up rack holds a meal's dishes, not a holiday's. Big loads still need a countertop rack — set a tray under it.
Our take: on butcher block the ledge is not just the modern drainboard — it is the better one. You keep your prep space, and every drop of water lands where a wood counter needs it: in the sink.
Positive, Zero or Negative Reveal with Butcher Block?
The reveal controls how the cut edge of the butcher block aligns with the sink bowl.
- Positive reveal: Part of the sink rim remains visible. Because the counter stops farther from the bowl, the wood edge receives less direct splash and impact exposure, although the visible lip creates another line to clean.
- Zero reveal: The sink and countertop align. The wood edge remains close to the basin, requiring accurate fabrication and a carefully maintained joint.
- Negative reveal: The counter overlaps the sink. This hides the rim but suspends the wood edge directly above the bowl, where it receives the greatest exposure to water, cookware and impact.
For butcher block, a positive reveal generally keeps the exposed end grain farthest from the basin, while a negative reveal places the wood edge in the most exposed position.
That does not make a positive reveal universally best. Sink geometry, finish quality, cleaning preference and the fabricator’s approved detail still determine the right choice.
For the complete differences between the configurations, see the guide to positive, zero and negative farmhouse sink reveals.
Recommended Installation Order
Treat the sink, cabinets and butcher block as one coordinated system:
- Confirm the sink, cabinet, faucet and plumbing layout.
- Reinforce or modify the sink base.
- Install the independent sink support.
- Set, center and level the basin.
- Confirm the apron position and reveal.
- Template, cut, sand and dry-fit the butcher block.
- Seal the top, underside, opening and drilled holes.
- Allow the final coat to cure fully.
- Install the counter and seal the sink joint.
- Install the faucet and test for leaks.
Do not rush from the final coat directly into installation. Silicone or mounting hardware can trap a finish that has not fully cured.
Preventing Water Damage Around a Butcher Block Sink
Preventing water damage requires both daily moisture control and maintenance suited to the selected finish system.
For everyday use:
- Wipe pooled water from the faucet base, rear ledge and sink corners.
- Do not leave wet sponges, dishcloths or cutting boards on the counter.
- Move dirty dishes into the sink or dishwasher rather than leaving them across the wet edge.
- Check beneath the sink after plumbing or faucet work.
- Keep countertop seams and the backsplash line dry.
For an oil-only system, inspect the wood at least monthly for dry areas, raised grain or places that absorb water quickly. University of Maine guidance recommends conditioning wooden cutting boards approximately once a month, although a fixed butcher block counter should ultimately follow the finish manufacturer’s instructions and may require different maintenance based on use.
For a film-forming finish, do not add mineral oil as routine maintenance. Inspect the surface and sink cutout for scratches, worn areas, peeling or joint separation, then repair or recoat according to the finish manufacturer’s directions.
Early warning signs include:
- Darkening around the sink opening
- Raised or rough grain
- Open countertop seams
- Soft wood
- Cracked or separating silicone
- Areas that absorb water instead of shedding it
Correct the moisture source before adding another coat of oil or sealer. Applying finish over damp or deteriorating wood does not solve the underlying problem.
Common Installation Mistakes
Letting the Counter Support the Sink
The base cabinets and internal frame should carry the load. The butcher block and silicone joint are not structural supports.
Cutting from Nominal Dimensions
Measure the actual installed sink or use an approved template. Do not assume the listed width is the exact cutout dimension.
Sealing Only the Top
The underside, end grain, corners and drilled holes can admit moisture even when the visible surface looks protected.
Treating Silicone as a Wood Finish
Silicone seals the joint. It does not make unfinished wood water resistant.
Drilling After Finishing Without Resealing
Every new faucet or accessory hole exposes raw wood. Seal the inside of the hole before mounting the fixture.
Choosing a Reveal Only for Style
Consider moisture exposure, cleaning and future joint repair—not only the initial appearance.
White Farmhouse Sink with Butcher Block Countertop: Wood Tone Pairings
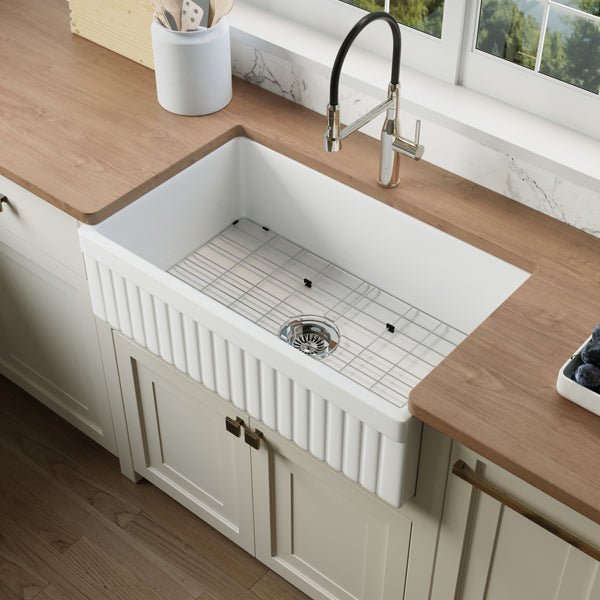
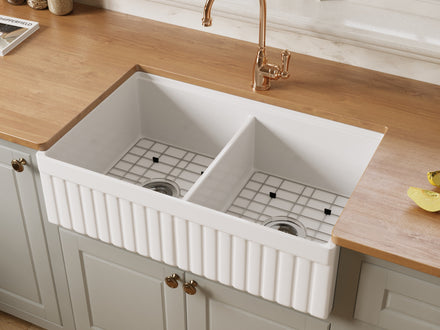
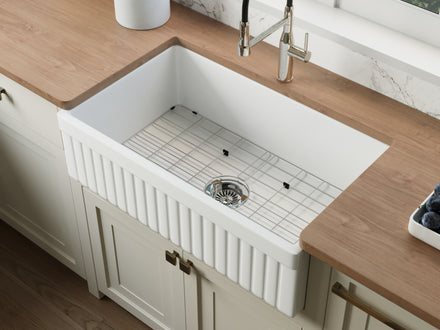
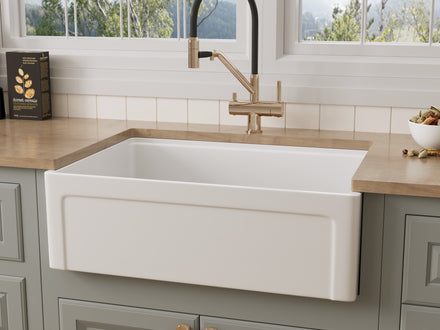
A white fireclay farmhouse sink creates contrast between a smooth glazed apron and natural wood grain. The collection includes 30- and 33-inch apron-front configurations for different cabinet and bowl layouts.
Different butcher block tones produce different results:
- Maple or birch: Light and restrained for Scandinavian, transitional or compact kitchens
- Oak: More visible grain with a warmer traditional or modern farmhouse style
- Walnut or dark-stained wood: Stronger contrast against the white apron front
Stainless steel, brushed nickel and matte black faucets all pair easily with white fireclay and wood countertops.
Compare the actual sink glaze, cabinet color and finished wood sample under the kitchen’s lighting. Unfinished butcher block can change noticeably after a coat of oil or sealer, so do not choose the final wood tone from an unfinished sample alone.


Final Takeaway
A farmhouse sink and butcher block counter work well together when support, fabrication and moisture protection are settled before cutting begins.
Support the sink from the cabinets, template from the actual fixture, seal every exposed wood surface and maintain the faucet and sink joints. For homeowners still evaluating the material itself, the guide to whether a fireclay farmhouse sink is worth it covers durability, cost and ownership trade-offs separately.
Frequently Asked Questions
Can you install a farmhouse sink in butcher block?
Yes. The farm sink should have independent cabinet support, while the butcher block is cut and sealed around it. Position and level the actual sink before approving the final countertop template.
How should butcher block be sealed around a sink?
Seal the top, underside, cut edge, end grain, corners and faucet holes with a finish approved for wood countertops and the intended kitchen use. Once the finish has fully cured, seal the sink joint with compatible silicone.
Does a fireclay farmhouse sink need separate support?
Yes. A NOZLOO fireclay farmhouse sink weighs approximately 100–115 lbs before water, dishes or cookware are added. The sink should rest on a reinforced frame, platform, rails or another rated support system inside the cabinet.
What reveal works best with butcher block?
A positive reveal generally keeps the wood edge farther from the basin, while a negative reveal exposes the edge to more splashing and impact. However, finish quality, sink geometry and fabrication accuracy matter more than the reveal type alone.
What causes water damage around a butcher block sink?
Damage commonly begins at unfinished cut edges, faucet holes, countertop seams or failed silicone joints. Standing water and wet items left around the sink area can accelerate the problem.