How to Install a Fireclay Farmhouse Sink: A Step-by-Step Guide

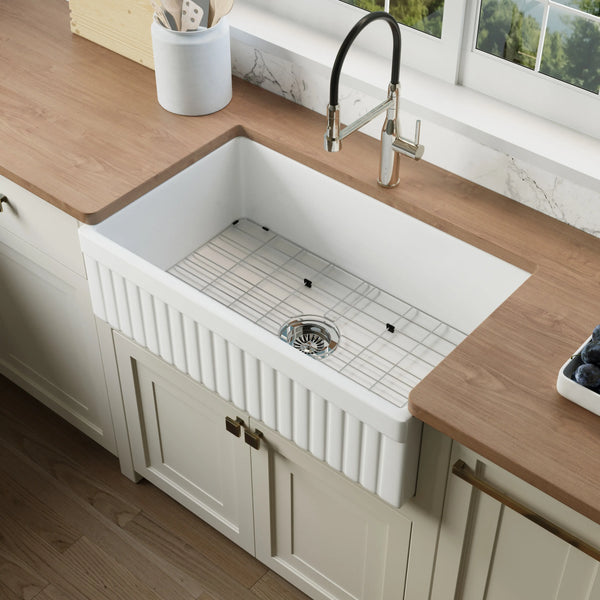
A fireclay farmhouse sink is one of those features that makes a whole kitchen feel finished. That deep basin, the apron front (the part of the sink you can see from the room, instead of it being hidden behind a cabinet door) — it just looks right. But if you’re standing over a 100-pound piece of fired clay wondering whether you can really install it yourself without cracking it, sagging your cabinet, or making an expensive mistake, you’re asking exactly the right questions.
Here’s the honest version. Two things scare most people off this job: the weight, and the quiet worry of “can I really do this myself?” Both are fair. And both have clear answers. A fireclay farmhouse sink is heavier and less forgiving than a regular drop-in sink, so it deserves respect. But the install is not a mystery, and a confident DIYer can do most of it — with a helper for the heavy parts and, often, a pro for the countertop.
One thing to settle before anything else, because it affects your whole timeline: fireclay sinks commonly take 4 to 6 weeks to make, since each one is genuinely fired to order. So order early — well before you plan to demo or template your counter. The day it arrives, inspect it and keep the packaging until you’re sure it’s perfect (more on that below).
This guide walks you through the job in plain language, in the order things actually happen, and it tells you the truth about where to get help. Let’s get you there.
The one rule that matters most
Before any tools come out, burn these two ideas into your brain. Almost every fireclay sink disaster traces back to ignoring one of them.
1. Support the weight — straight down to the floor. An empty fireclay farmhouse sink often weighs 100 pounds or more (a 33-inch model lands around 100 lbs on its own). Fill it with water and dishes and the load can reach 200 to 300+ pounds. That weight has to travel vertically down to the cabinet floor, not hang off the cabinet’s side walls. Get this right and everything else is easy. Get it wrong and your cabinet sags, separates, or cracks months later.
2. Measure the real sink — never cut from the spec sheet alone. Fireclay is fired in a kiln, and clay shrinks as it bakes. That means your actual sink can differ from its listed (“nominal”) size by up to about 2%. It’s completely normal. But it means you must measure the physical sink in front of you before you cut a single thing. The spec sheet is for planning; the sink itself is for cutting.

Before you start: tools, parts, and the order of operations
Tools and materials you’ll want on hand
- Tape measure, pencil, and a good level (a longer level is easier to read across the sink)
- Drill/driver and screws
- Jigsaw or oscillating multi-tool (for trimming the cabinet face)
- 2x4 lumber and plywood for the support frame — or a heavy-duty pre-made support bracket kit
- Cardboard for making a template of the apron
- Shims
- Waterproof (kitchen/bath) silicone
- Your drain/strainer assembly, and a garbage disposal flange if you’re using one
- Safety glasses, and a helper (for the lift, this is not optional)

The big-picture order
The exact sequence depends on your mount type, but in general you’ll: confirm the cabinet fits → build a level support frame → cut the cabinet face for the apron → dry-fit and level the sink → install the drain → set the countertop and seal → let it cure. We’ll break each one down below.
Do I need a special cabinet, or can I retrofit mine?
Good news: you usually do not need to buy a special “farmhouse cabinet.” Most standard sink base cabinets can be modified to take an apron-front sink. The main thing you’re doing is cutting an opening in the cabinet face so the apron can show through, and making sure the inside is strong enough to carry the weight.
What actually matters is interior width — the usable space inside the cabinet, not the outside dimension. A “36-inch cabinet” is measured on the outside; the inside is smaller. Use this table as a planning starting point, then let your sink’s spec/cut sheet make the final call:
| Your sink size | Typical cabinet size |
|---|---|
| 24–27 inch | 30 inch |
| 30 inch | 33 inch |
| 33 inch | 36 inch |
| 36 inch and up | 42 inch or custom |
You’ll sometimes hear “the cabinet must be 3 inches wider than the sink.” That’s a handy retrofit rule of thumb, not a law. The real answer is on the manufacturer’s spec sheet, which always overrides any rule of thumb. If the numbers there disagree with the rule of thumb, trust the spec sheet.

Undermount or Drop-In? Pick Your Mount Type First
How the sink is supported relative to the countertop affects the installation sequence. It is separate from the reveal, which describes how the countertop opening meets the sink rim.
| Mount type | How it sits | Countertop relationship | Difficulty |
|---|---|---|---|
| Undermount | The sink rim sits below the countertop | Can use a positive, zero, or negative reveal | More involved |
| Top-mount / drop-in | The sink rim rests above the countertop | The rim covers the cutout from above | More retrofit-friendly |
For an undermount installation, you must also decide whether the countertop will expose the sink rim, align with it, or overlap it. Compare those options in our Farmhouse Sink Reveal: Positive, Zero, or Negative? guide.
Choose undermount when you want the sink installed below the counter and are prepared for more precise countertop fabrication. Choose drop-in when you want the rim to rest above the counter and prefer a simpler retrofit.

The sequence fork (this trips people up)
This is the single most confusing part of the whole job, so here it is plainly:
- Undermount and flush: set and level the sink first, then the countertop is templated and cut around your already-installed sink.
- Drop-in / top-mount: the countertop usually goes in first, then you drop the sink into a cut opening.
So the answer to “do I install the countertop or the sink first?” is: it depends on your mount type. Undermount = sink first. Drop-in = counter first. Keep that straight and the order of the steps below will make sense.

Will the sink chip or crack while I’m installing it?
This is the fear nobody says out loud, so let’s handle it head-on. Fireclay is tough in daily use — it shrugs off years of dishes, pots, and scrubbing. The vulnerable moment is handling, when a hard knock against a corner or a rim can chip it. The good news: a few simple habits remove almost all of that risk.
- Inspect it the moment it arrives. Unbox carefully and check every surface and corner before you do anything else.
- Keep the original packaging until the sink is permanently installed and you’re 100% sure it’s perfect. If there’s ever a problem, that packaging makes a claim far easier — and it doubles as a safe surface to rest the sink on.
- Lift with a partner, gripping the bowl — not the rim or the apron. Two people, hands under the basin, is the safe way to carry that weight.
- Set it down on a soft surface — a moving blanket or the shipping foam — never a hard bare surface like stone or concrete. A bare-floor landing is the classic way to chip a corner.
- Never force a tight fit. If the sink doesn’t drop into the opening easily, stop and adjust the opening. Forcing ceramic is how it cracks. Trim the cabinet or shim the frame instead of muscling the sink.
Do those five things and the odds of damaging your sink during install drop close to zero.

Step-by-step: installing your fireclay farmhouse sink
Step 1: Inspect the sink the moment it arrives
When your sink shows up, unbox it carefully and inspect every surface and corner for chips or cracks before you do anything else. Keep all the packaging until you’re 100% sure the sink is perfect. (If you skipped the section above, those five handling habits are what keep this heavy, beautiful thing in one piece.)
Step 2: Measure the real sink and confirm the cabinet fits
Now put the tape measure on the actual sink — width, depth, height, and the apron. Compare those real numbers (not the listed ones) to your cabinet’s interior. This is where that 2% tolerance gets handled: you’re working from the object in front of you, not the brochure. Measure the thing, and small variances simply disappear.
Step 3: Build the support frame (the make-or-break step)
This is the step that protects your cabinet and your sink for years — and it’s the one worth slowing down for. Build a level frame from 2x4 lumber inside the base cabinet so the sink’s weight transfers straight down to the cabinet floor. The sink will rest on this frame.
- Do not rely on screwing the sink to the side walls. Cabinet walls aren’t built to carry sustained vertical load — over time they can sag or pull apart.
- If the cabinet floor feels weak, reinforce it with plywood first so it can take the load without flexing.
- For an undermount, size the frame with this formula: frame height = cabinet interior height − sink height − 1/8 inch clearance. That tiny 1/8-inch gap gives you room to level and seat the sink cleanly.
- Prefer not to build? Heavy-duty support bracket kits exist that are rated to about 400 lbs and adjust to fit roughly a 32–46 inch inner cabinet width. You can use one instead of a built 2x4 frame, or as a supplement to it.
Check that the frame is dead level before moving on. A level frame now is the difference between a sink that holds for decades and one that fights you for the rest of the install.

Step 4: Cut the cabinet face for the apron
To let the apron show, you cut an opening in the front of the cabinet. Do it carefully:
- Mark the cutout using the real sink or a cardboard template of the apron — not guesses off the spec sheet.
- Leave about a 1/4 inch gap on each side of the sink for wiggle room.
- Cutout height is roughly 7.5 inches up to about 11 inches depending on your sink, so confirm yours on the spec.
- Confirm the cutout is centered before you cut. Measure twice.
- Keep the pieces you remove — they’re often reused as trim to finish the opening neatly.

Step 5: Dry-fit and level the sink
Set the sink onto the frame — this is the lift, so have your helper here, and remember: hands under the bowl, ease it down, never force it. Center it in the opening, then check level front-to-back and side-to-side. Add shims as needed so the basin drains properly toward the drain rather than pooling water. Look at the apron: are the side gaps even? Does it stick out (protrude) the right amount? Fix all of this now, while everything is still adjustable. If the fit feels tight anywhere, adjust the opening — don’t push the sink.

Step 6: Install the drain and disposal
Install the drain/strainer — and the garbage disposal flange if you have one — while the sink is still easy to reach. For an undermount, that means before the countertop goes on. It takes minutes now, with full access; do it later, reaching up into a cramped cabinet under an installed counter, and it becomes a miserable job. Get it done while you have room.
Step 7: Set the countertop and seal
- Undermount: with the sink leveled and the drain in, the countertop is templated, cut, and set over the sink. Run a bead of waterproof silicone between the underside of the counter and the top rim of the sink — once cured, this both seals the joint and helps hold the sink in place.
- Drop-in: the countertop is in first, so you simply lower the sink into the prepared opening and seal the rim.
Decide your faucet style before the counter is templated. A deck-mount faucet needs holes drilled in the countertop; a wall-mount faucet doesn’t. Make that call early so the template is right the first time.
Step 8: Let it cure, then enjoy the first pour
Patience pays off here. Let the silicone fully cure — about 24 hours — before you run water or use the sink normally. Using it too soon is one of the most common ways people undo all their careful work, so give it the full day.
Then comes the part you’ve been waiting for. Turn the water on, check for any drips under the cabinet, watch it drain cleanly — and enjoy the moment. That deep, apron-front basin you’ve been picturing is finally yours to use.
Should you DIY this? An honest box
The honest take. Most steps of a fireclay farmhouse install are genuinely DIY-friendly if you’re comfortable with a drill, a level, and a jigsaw — measuring, building the support frame, cutting the cabinet face, and installing the drain are all within reach for a confident homeowner.
Where a second set of hands or a pro is smart:
- The lift. A 100+ lb sink is awkward and unforgiving. Always have a second person. This isn’t about raw strength — it’s about setting it down gently and squarely without chipping it or pinching fingers.
- The countertop. Templating and cutting stone or solid surface around an undermount sink is precise work. Many homeowners do everything else themselves and bring in a pro just for the counter. That’s a smart, common split — not a failure.
- The plumbing connections. Hooking up the water supply lines, P-trap, and drain (and wiring a disposal) is doable for many DIYers, but if you’re not confident with water connections, this is a sensible place to call a plumber. A small leak you can’t see is worth avoiding.
You don’t have to choose all-DIY or all-pro. The most successful installs are usually a hybrid: you handle the prep and support, a helper handles the lift, and a fabricator or plumber handles the parts you’d rather not gamble on.
Common mistakes — what NOT to do
Frame each of these as a small promise to yourself. Avoid these five and you’ve avoided almost everything that goes wrong:
- Don’t buy or cut without measuring the real sink. Because of that ~2% kiln-firing tolerance, cutting from the listed size can leave you with a sink that doesn’t fit its opening. Measure the actual object.
- Don’t skip transferring the weight to the floor. Hanging the sink off the cabinet’s side walls leads to sagging and cracking. A level 2x4 frame (or a rated bracket kit) carries the load down to the floor where it belongs.
- Don’t cut the cabinet before the sink physically arrives. Cut early and you’re committing to dimensions you haven’t verified. Wait for the sink, then cut to it.
- Don’t install the countertop before the sink is leveled (on an undermount). The counter is templated around a properly seated sink — do it in the wrong order and you’ll be reworking expensive material.
- Don’t use the sink before the silicone has cured. Give it the full ~24 hours. A few hours of patience protects the seal and the bond.
FAQ
Will my cabinet or floor actually hold something this heavy? Will it crack the cabinet?
It will hold it — if the weight goes straight down to the floor. Build a level 2x4 support frame (or use a bracket kit rated to ~400 lbs) and reinforce a weak cabinet floor with plywood. Cabinets crack when the load hangs off the side walls, not when it rests on a proper frame.
Will the sink chip or crack while I’m installing it?
Fireclay is durable in daily use; the risk is a hard knock during handling. Never lift it alone, grip the bowl rather than the rim, set it down on a blanket or its foam packaging instead of bare stone or concrete, and never force a tight fit. Do that and chipping is very unlikely.
My sink looks slightly smaller than the listed size — is it defective?
Almost certainly not. Fireclay shrinks as it’s fired in the kiln, so the finished sink can come out up to about 2% smaller than its nominal (listed) size. This is normal and expected, not a defect. It’s also exactly why you measure the real sink before cutting — that measurement, not the brochure, is what guarantees a good fit. (The apron cutout has its own separate wiggle room: about 1/4 inch of clearance on each side.)
Do I need a special farmhouse cabinet?
Usually no. Most standard sink base cabinets can be retrofitted — you cut the face for the apron and make sure the interior carries the weight. Check your sink’s spec sheet against your cabinet’s interior width to confirm.
How do I get the apron front even and not crooked?
Mark the cutout from the real sink or a cardboard template, leave about 1/4 inch of clearance on each side, and confirm the opening is centered before cutting. Then at the dry-fit stage, eyeball the side gaps and protrusion and adjust before anything is permanent.
Undermount or drop-in — which is easier?
Drop-in (top-mount) is the easiest and most retrofit-friendly: the rim sits above the counter, so there’s less cabinet and counter work. Undermount is more involved but gives the seamless look most people want with fireclay. Pick based on how much work you want to take on.
Do I install the countertop or the sink first?
It depends on the mount. Undermount and flush: sink first, then the counter is cut around it. Drop-in: countertop first, then you drop the sink into the opening.
How long until I can actually use my sink?
Plan on about 24 hours after sealing — let the silicone fully cure before running water or using the sink normally.
What tools do I need?
At minimum: tape measure, pencil, level, drill/driver, a jigsaw or oscillating tool, 2x4s and plywood (or a bracket kit), cardboard for a template, shims, waterproof silicone, and your drain assembly. Plus a helper for the lift.
How far ahead should I order?
Fireclay sinks commonly take 4–6 weeks to make, so order early — well before you’re ready to demo or template the counter. And the day it arrives, inspect it and keep the packaging until you’re sure it’s perfect.
You’ve got this
Strip away the intimidation and a fireclay farmhouse sink install comes down to two disciplines: carry the weight to the floor, and measure the real sink. Nail those and the rest is careful, satisfying work — the kind of project you’ll point to every time someone admires your kitchen.
If you’re choosing your sink or double-checking dimensions, browse the fireclay kitchen sinks collection and pull up your model’s spec sheet before you cut anything. And if you get stuck on sizing or which mount type suits your cabinet, reach out to our team — we’re happy to help you get it right the first time.