

How to Install a Kitchen Sink Drain: Basket Strainer, Seal & Leak Test

Reviewed: August 23, 2026 · This guide covers a conventional basket-strainer assembly from the basin opening to the tailpiece. The delivered kit, sink instructions, component labels, and locally adopted code control the final installation.
Quick answer: Confirm the sink opening, drain kit, sink material, and supported thickness. Dry-fit every part. Apply only the bedding compound approved by both the sink and strainer makers, seat the top flange, assemble the underside in the kit's stated order, and tighten only enough to compress the seal evenly. After any required cure, run a static-water test followed by a full-flow test. Do not use the drain fitting to clamp or support a fireclay sink.
A “kitchen sink drain” can mean the 3.5-inch opening, basket strainer, 1.5-inch tailpiece, P-trap, or fixed pipe. This article stays at the bowl assembly. If you are still comparing basin terminology and cabinet fit, start with our standard kitchen sink size guide.

Know Where This Installation Starts and Stops
| Part | Job | Covered here? |
|---|---|---|
| Basin opening and top flange | Receives and seals the basket strainer | Yes |
| Gasket, friction washer, locknut or kit-specific retainer | Compresses the approved seal at the bowl | Yes—exact order follows the kit |
| Tailpiece connection | Transitions from the strainer outlet toward the trap | Yes, at the strainer interface |
| P-trap, trap arm, wall drain, slope, and vent | Routes waste into the fixed plumbing system | No—use the rough-in guide |
| Garbage-disposal flange and mount | Replaces the basket-strainer assembly | No—use the fireclay disposal guide |
One current adoption of the 2024 residential-code language—the 2024 North Carolina Residential Code—requires approved strainers and sets a 1.5-inch minimum for sink tailpieces and waste outlets. Treat that as a useful example, not universal approval: locally adopted code and the listed-component instructions still control, and they do not make every basket strainer or gasket stack interchangeable.
Identify Every Part Before Adding Sealant
A common basket-strainer stack has a visible strainer body or flange above the bowl, approved bedding material under that flange, then a gasket, friction washer, and locknut below. A separate washer and nut often connect the outlet to a tailpiece. Some kits add a cup, ring, screws, or a different retainer. Never discard a part because a generic diagram does not show it.

Do not confuse two seals. Bedding compound seals the top flange to the sink. The underside gasket and retainer compress that interface. The tailpiece connection has its own washer or seal. Adding random putty to every thread can prevent the designed parts from seating correctly.
Plumber's Putty vs. Silicone for a Sink Drain
There is no honest universal winner. The correct choice must be compatible with the sink surface and permitted by the drain-kit instructions.
| Bedding option | Useful when | Do not assume |
|---|---|---|
| Regular plumber's putty | Both rigid surfaces and the component maker approve it | That it is safe on porous stone, plastic, acrylic, or every composite |
| Stain-free putty | The label approves the sink/counter material and the drain maker permits putty | That “stain-free” means compatible with every plastic or finish |
| 100% silicone | The sink or drain instructions call for a compatible silicone | That all silicones share the same adhesion, cure time, or metal compatibility |
| Included gasket only | The exact drain instructions explicitly specify a gasket-only installation | That an omitted top seal is safe because a generic video did it |
Current basket-strainer guidance from a plumbing-component manufacturer says putty or silicone may work with its metal components, but the sink material can change the choice and the sink maker's recommendation should be checked. Its putty guidance also identifies surfaces where regular putty is not appropriate. Read the label of the product in your hand.
How to Install a Kitchen Sink Basket Strainer
- Make the area safe. Turn off and isolate any disposal circuit if one is nearby. Protect the bowl, clear the cabinet, and make sure the heavy sink is fully supported before working below it.
- Inspect and measure. Confirm the bare opening, sink thickness at the drain, flange reach, outlet size, and every part on the packing list. Replace a damaged, flattened, hardened, or missing seal.
- Dry-fit the complete stack. The flange should sit flat; the underside parts should engage without forcing or cross-threading. Confirm the tailpiece route before sealant makes the assembly messy.
- Clean and dry the interfaces. Remove old putty or silicone with tools and cleaners approved for the sink and metal finish. Do not scratch a glazed surface or leave oil, cleaner, water, or debris under the flange.
- Apply the approved bedding material. Form putty as directed or apply the silicone bead specified by its label. Place it evenly under the top flange, not in the tailpiece threads.
- Seat the flange from above. Center it in the opening and press evenly. Keep the strainer from rotating while the underside is assembled.
- Install underside parts in the kit's order. Orient each gasket and washer exactly as shown in the drain instructions. Start threads by hand.
- Tighten progressively. Hold the top part steady and tighten only until the flange is seated and the seal compresses evenly. Do not use the locknut to pull a misaligned assembly into place.
- Remove the squeeze-out. Clean excess bedding material using the method on its label. Do not disturb the joint while a silicone seal cures.
- Connect the tailpiece. Use the specified washer and nut at the outlet. Align the tube naturally; a side-loaded connection can leak even when the flange is sealed.
If the basket strainer is replacing an old one, compare the new kit with the sink—not only with the removed part. A previous installer may have used the wrong gasket, overtightened the locknut, or substituted incompatible sealant.
Run a Two-Stage Leak Test
- Wait for any required cure. A putty-set assembly and a silicone-set assembly may have different timing. Follow the selected product and drain-kit instructions.
- Dry everything below. Moisture left from installation makes a new leak hard to locate. Place dry tissue or paper beneath the flange and tailpiece connection.
- Static test the flange. Plug the drain and hold a shallow pool of water over it for the time specified by the kit or installer. Inspect the full underside perimeter.
- Flow test the outlet. Release the water and watch the flange, outlet, washer, nut, and tailpiece during flow. Then run the faucet and repeat.
- Recheck after normal use. Inspect the dry cabinet later the same day and again after several cycles. A slow trace can appear only after the assembly has been loaded and warmed.

Find the Leak Before Tightening Again
| When water appears | First interface to inspect | Safer response |
|---|---|---|
| During the static plugged test | Top flange bedding and bowl opening | Disassemble, clean, inspect, and reseal; do not smear silicone underneath |
| Only when water drains | Outlet washer, nut, or tailpiece alignment | Confirm the washer orientation and remove side load |
| At the P-trap or wall | Fixed-plumbing connections | Move to the rough-in diagnosis; the strainer flange may be fine |
| At a disposal mount | Manufacturer-approved disposal flange and mount | Follow the disposal instructions; a basket strainer does not remain there |
Do not keep tightening until a leak disappears. Overtightening can deform a washer, strip threads, distort a thin sink, or concentrate force against a brittle ceramic or fireclay body.
Fireclay and the NOZLOO NZ-103W3320
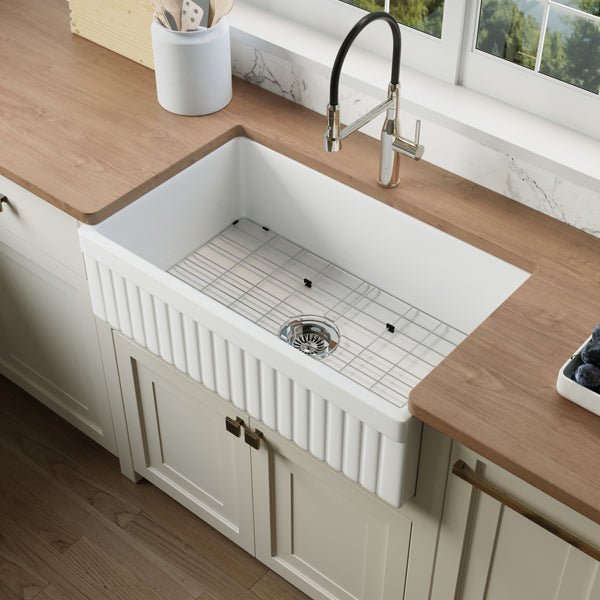
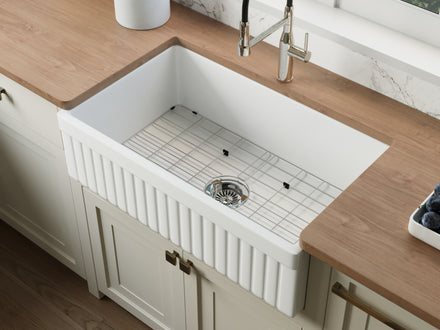
Current NOZLOO instructions allow plumber's putty or a compatible silicone around the included strainer flange and warn against excessive clamping force. The NZ-103W3320 has one centered 3.5-inch opening and includes a conventional basket-strainer drain assembly. A compatible garbage disposal uses its own approved flange and mount instead.
The sink measures 33″ × 20″ × 10″ overall and about 105 lb, with a 31″ × 17¾″ interior and a 36-inch minimum cabinet. Its 9-inch interior depth is measured vertically at the lowest point at the centered drain—not at a side wall. The cabinet support carries the bowl; the drain locknut does not.

For the full sink, cabinet, countertop, and support sequence, use our fireclay farmhouse sink installation guide. This drain article deliberately does not repeat that structural work.
Frequently Asked Questions
Do I have to use plumber's putty on a kitchen sink drain?
No universal rule applies. Use the bedding material approved by both the sink and drain-kit manufacturers. Some materials or components prohibit regular putty, while some instructions specify compatible silicone or a gasket-only system.
Does the rubber gasket go above or below the sink?
On many basket strainers the bedding compound is under the top flange and a rubber gasket sits below the sink, followed by a friction washer and retainer. Kits vary, so follow the exploded diagram supplied with the exact drain.
How tight should a kitchen sink drain locknut be?
Tight enough to seat the flange and compress the designed seal evenly, using the kit's instructions. Stop if parts distort, threads bind, the flange rotates, or excessive force is needed—especially on fireclay.
Why does my new basket strainer leak only when the sink drains?
A flow-only leak often points to the outlet washer, nut, or a misaligned tailpiece rather than the top flange. Dry the assembly and trace the first point where water appears.
Can I install a garbage disposal on the included basket strainer?
No. A disposal's approved flange and mounting system replace the basket-strainer assembly. Confirm flange reach, sink thickness, cabinet clearance, outlet height, electrical work, and disposal support before installation.
The Bottom Line
A reliable drain installation comes from matching the exact sink, drain kit, and bedding material—not copying one generic gasket stack. Dry-fit first, follow the supplied order, avoid overtightening, and test the flange under standing water as well as the outlet under flow.