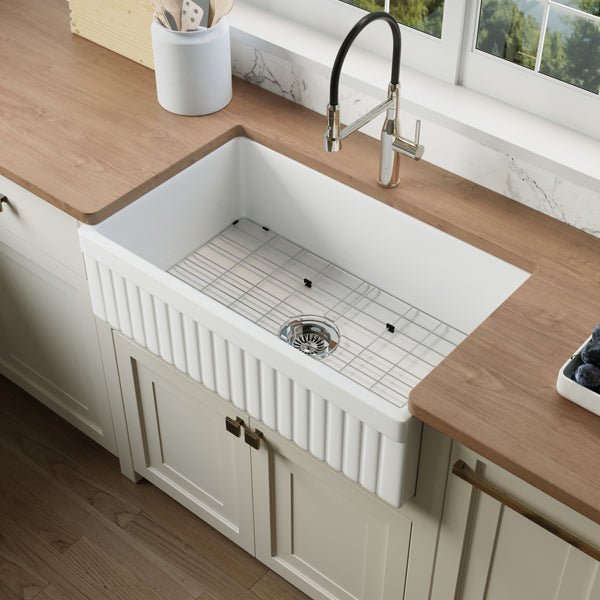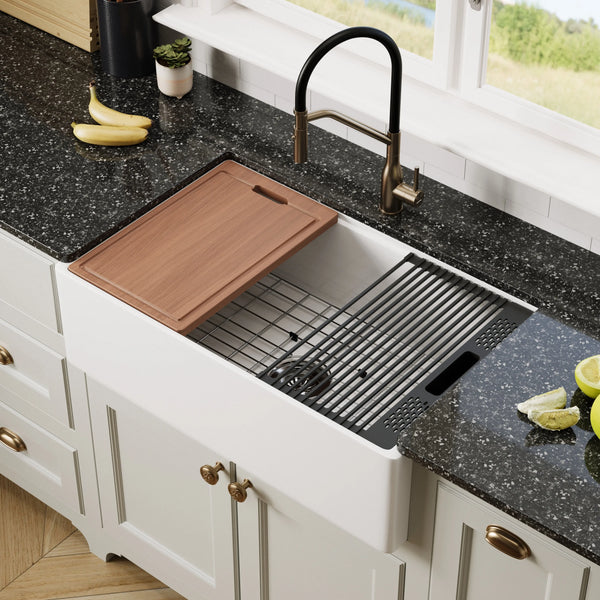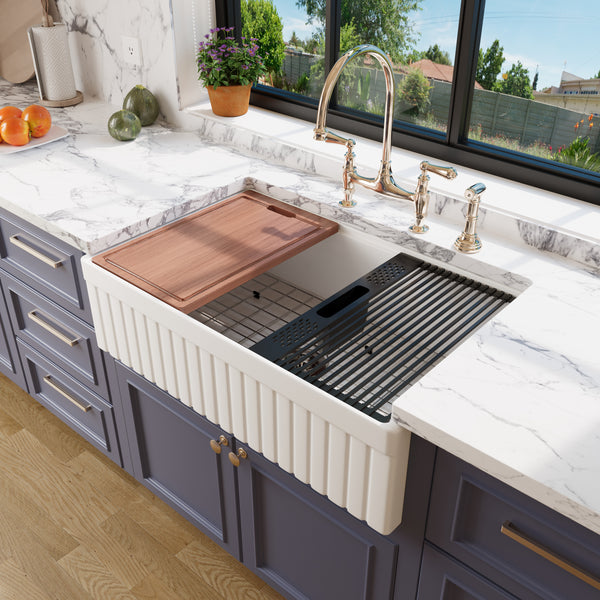
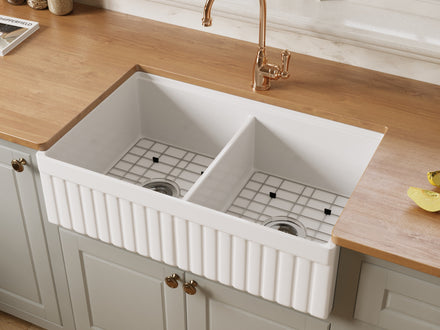
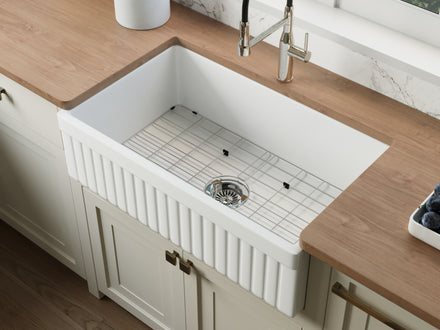
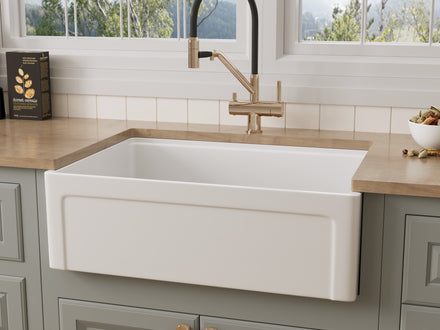
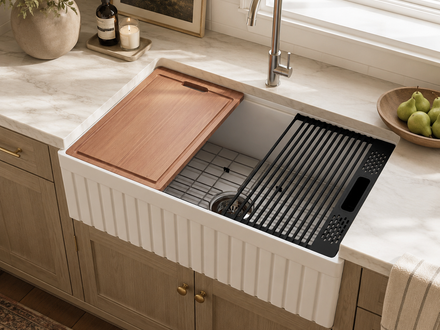
How to Replace a Farmhouse Sink Without Replacing the Countertop

Replacing a farmhouse sink does not always mean replacing the countertop or rebuilding the entire cabinet. In many cases, you can keep the existing countertop if the new sink works with the current cutout, apron opening, cabinet support, and plumbing clearance.
The catch is that nominal sink size alone does not determine fit. Two farmhouse sink models sold as 30-inch or 33-inch sinks can differ in apron height, exterior depth, corner shape, rim profile, bowl depth, and drain location.
If you searched “replace farmhouse sink” because your old sink is cracked, worn, too small, or simply no longer works for your kitchen, measure what is already installed before ordering the replacement. That one step can determine whether you are looking at a straightforward swap or a project involving granite cutting, cabinet modifications, and plumbing changes.
Farmhouse Sink Replacement Compatibility at a Glance
Use this table before deciding how much work your replacement is likely to involve.
| Replacement Situation | What It Usually Means |
|---|---|
| Similar sink with matching apron and cutout | Usually the simplest replacement |
| New sink is slightly larger | Countertop and cabinet opening may need modification |
| New sink is smaller | Existing countertop or cabinet edges may remain visible |
| New sink has a deeper bowl | Support height and drainage pipes may need adjustment |
| Double bowl sink to single sink | Drain and garbage disposal positions may change |
| Different apron height or width | Cabinet face or face frame may need modification |
| Standard sink to workstation model | Check exterior dimensions, ledges, drain position, and support |
| Farmhouse sink to undermount sink | Often requires cabinet reconstruction and possibly countertop work |
| Granite or quartz cutout must change | Have a stone fabricator evaluate the opening |
The closer the new sink matches the physical footprint of the old sink, the easier the replacement is likely to be. That does not mean you need the same model, but it does mean the critical dimensions need to work together.
Can You Replace a Farmhouse Sink Without Replacing the Countertop?
Yes, sometimes.
A countertop can usually stay when the replacement farmhouse sink fits the existing cutout, works with the current apron front opening, and can be supported correctly inside the cabinet.
Problems usually appear when the new sink is:
- wider or narrower;
- deeper from front to back;
- taller or shorter at the apron;
- shaped differently at the corners;
- installed with a different mount style; or
- positioned differently around the drain and faucet.
Granite and quartz make these differences more important because an existing stone cutout cannot simply be reversed once it has been made.
The Natural Stone Institute's installation standards address countertop fabrication considerations such as sink cutouts, tolerances, and stone installation. If an existing granite opening must be enlarged or reshaped, a stone fabricator should evaluate the actual slab before cutting.
Nominal Sink Size Is Not a Replacement-Fit Measurement
This is one of the easiest mistakes to make when replacing a farmhouse sink.
A 33-inch farmhouse sink does not automatically fit the opening left by another 33-inch farmhouse sink.
The advertised width tells you only part of the story. Before buying a new sink, compare:
- overall width;
- front-to-back dimensions;
- total sink height;
- bowl depth;
- apron height;
- apron width;
- corner radius;
- rim profile;
- drain location;
- mounting method; and
- manufacturer dimensional tolerance.
This is especially important with fireclay. Because fireclay sinks are formed and fired rather than stamped from stainless steel, manufacturers may specify dimensional tolerances for individual models.
Whenever the installation instructions call for it, use the physical sink for final fitting and countertop templating rather than relying only on published dimensions.
Cabinet width is also only the starting measurement. Our fireclay farmhouse sink cabinet size guide explains how sink width, usable cabinet space, apron clearance, and internal support affect fit.
Measure Before Removing the Old Sink
Do not start by disconnecting the plumbing.
Start with a tape measure and a few pictures.
Take a clear picture from above the sink, another of the apron front, and at least one inside the cabinet showing the support frame, disposal, and drainage pipes. These references become useful once the old sink is no longer in place.
Measure the Existing Sink
Record the outside width, front-to-back depth, overall height, and bowl depth.
If you have a double bowl sink and are moving to a large single sink, also note where the existing drains sit. The new drain may be centered, offset, or positioned differently enough to require changes below the bowl.
Measure the Apron Front
Measure the visible apron from side to side and from top to bottom.
Then inspect how the apron fits into the cabinet face.
A farmhouse sink is different from a conventional kitchen sink because the apron front projects through the front of the sink base. If the new apron is smaller, part of the old opening may show. If it is larger, the cabinet face or face frame may need additional cutting.
Pay particular attention to the upper corners and edges of the opening. A different apron profile can create a poor fit even when the overall width looks correct.
Measure the Countertop Cutout
Measure the opening at the front, back, and sides. Look closely at the corners.
For an undermount installation, note how much of the sink rim is exposed beneath the counter. A smaller replacement could reveal unfinished edges that were previously hidden, while a larger sink may require the cutout to be enlarged.
With granite or other stone, inspect the polished edges for existing chips or cracks before any work begins.
Measure Inside the Cabinet
Do not stop at the cabinet's advertised width.
Measure the actual usable space inside, including any face frame, side panels, blocking, drawer hardware, and support rails.
Also check the room available below the sink. A deeper bowl can reduce clearance for the garbage disposal, P-trap, dishwasher connection, and stored items.
Inspect the Existing Support Before Reusing It
Once you understand the dimensions, look closely at how the old sink is supported.
A heavy apron front sink should be supported according to its manufacturer's installation requirements rather than relying on the decorative cabinet face alone.
Depending on the installation, you may find:
- solid wood support rails;
- vertical wood posts;
- plywood;
- blocking attached to the cabinet walls; or
- a combination of these materials.
Check the frame for water damage, splits, movement, or loose fasteners.
If existing rails are attached with pocket screws, make sure those joints remain tight and that the surrounding wood has not softened from past leaks. Do not reuse damaged plywood simply because the old sink was resting on it.
The support also has to place the new sink at the correct height. An undermount sink must sit where its rim meets the underside of the countertop as intended, while a flush installation has different alignment requirements.
If the new sink is deeper or heavier, the old frame may need to be adjusted or rebuilt.
What If the New Farmhouse Sink Is Smaller?
A smaller sink can be more difficult than it sounds.
It may physically drop into the cabinet, but the countertop cutout or apron opening was made for the larger old sink. That can expose:
- unfinished stone edges;
- gaps beside the apron;
- previous cabinet cuts; or
- unsupported areas around the sink.
For an undermount sink, even a modest difference in width or corner radius can make the previous granite cutout visible.
Do not assume trim or sealant will solve a dimensional mismatch. First decide whether the exposed edges can be finished properly.
What If the New Sink Is Larger?
A larger farmhouse sink may require both stone and cabinet work.
The cabinet face may need to be cut wider or lower for the new apron. Inside, the support frame may also need to move.
The countertop is usually the bigger concern.
Laminate, butcher block, and some other materials can often be modified with conventional woodworking or fabrication methods. Granite and quartz require specialized stone cutting and edge finishing.
OSHA notes that cutting, grinding, drilling, and polishing natural and manufactured stone can generate respirable crystalline silica. Its guidance is written for occupational exposure, but it demonstrates why uncontrolled stone cutting is a serious fabrication issue. OSHA's crystalline silica guidance provides more detail on the hazard.
For homeowners, modifying granite or quartz is generally a job for an equipped stone fabricator rather than an improvised DIY cut.
What If the Mounting Style Changes?
Not every farmhouse-style sink mounts the same way.
An undermount sink is secured below the countertop. A flush mount aligns differently with the counter surface. A drop in farmhouse sink uses a visible rim that rests at the countertop opening while retaining the apron front.
Changing from one mount style to another can change:
- cutout dimensions;
- edge exposure;
- support height;
- sealing requirements; and
- how the sink is attached.
A drop in farmhouse sink can sometimes cover more of the countertop opening than an undermount design, but do not assume it will hide an incompatible cutout. Compare the installation template and actual dimensions before you decide.
Remove the Old Farmhouse Sink Carefully
Once you know the new sink can work, plan how the old sink will come out.
Clear everything from the cabinet and protect the surrounding counter and cabinet face. Shut off the water supply before disconnecting anything.
Depending on the installation, you may need to:
- Disconnect the faucet supply lines if they interfere with removal.
- Disconnect the dishwasher hose if it runs through the garbage disposal.
- Disconnect the garbage disposal or basket strainer.
- Disconnect the P-trap and other drainage pipes.
- Cut the existing seal around the sink.
- Remove brackets or other attached mounting hardware.
- Support the sink before releasing the final mount.
- Lift or slide the old sink out with enough help for its weight.
Do not assume you can safely lift a fireclay or cast-iron sink alone. The awkward position inside a counter opening can matter as much as the sink's actual weight.
Also avoid working underneath the bowl while its last structural support is being removed.
Once the old sink is out, clean the opening and inspect all surrounding surfaces before putting the new sink anywhere near the countertop.
Check for Hidden Damage While the Sink Is Out
This is one of the most useful parts of a replacement project because you rarely get this level of access after the new sink is installed.
Look for:
- swollen plywood;
- dark or soft wood;
- previous leaks around the faucet;
- water marks near the drain;
- loose pocket screws or support rails;
- cracked sealant;
- damaged granite edges;
- corrosion around the disposal; and
- gaps between the apron opening and support frame.
Do not simply seal over water-damaged materials.
If the wood has lost structural strength, repair or replace it first. The rest of the installation depends on that support staying solid after the cabinet is filled again.
Adjust or Rebuild the Support Frame
If the old frame is sound and places the new sink at the right height, you may be able to reuse it.
If not, modify the support before the sink is installed.
A site-built frame may use solid wood rails, blocking, vertical supports, or plywood depending on the cabinet and the sink manufacturer's requirements. Keep enough access around the drain for future plumbing service.
Set the sink temporarily on the frame and check:
- height relative to the countertop;
- level from side to side;
- level from front to back;
- apron alignment;
- support contact;
- drain clearance;
- disposal clearance; and
- room behind the bowl for the faucet.
If the sink rocks, sits too low, or pushes against one side of the cabinet, fix the support instead of trying to force the sink into place.
Dry-Fit the New Sink Before Applying Sealant
Do not apply sealant the moment the sink comes out of the box.
Dry-fitting is where you find problems while they are still easy to correct.
Put the new sink onto its finished support and confirm that the apron is centered in the cabinet face. Check that the rim meets the countertop correctly for the intended mount and that the stone edges look consistent around the bowl.
Then look underneath.
Make sure the drain opening does not land directly over:
- a support rail;
- plywood that has not been cut for access;
- part of the cabinet frame; or
- another plumbing component.
If you are installing a garbage disposal, temporarily check the disposal body's position as well. A deeper sink can bring the disposal closer to the cabinet floor and change how the trap reaches the wall.
Only after the fit, support, and plumbing clearance are confirmed should the sink be sealed and permanently installed.
Reconnect Plumbing Around the New Drain Position
Changing the sink often changes what happens below it.
A double bowl sink may have two drains connected through a continuous waste arrangement. Replacing it with a single sink removes one branch, but the remaining outlet may no longer line up with the old trap.
Likewise, an offset drain can create more usable cabinet space on one side while moving the drainage pipes farther from their previous position.
When you reconnect plumbing, do not force rigid pipe sideways just to reach the new drain.
Check the:
- basket strainer or disposal flange;
- garbage disposal;
- dishwasher connection;
- tailpiece;
- P-trap; and
- wall connection.
The 2024 Uniform Plumbing Code from IAPMO includes provisions for sinks, drainage connections, traps, and food waste disposers. Plumbing requirements ultimately depend on the code adopted by your local jurisdiction, so more involved changes should be checked by a qualified plumber.
Keeping the existing disposal adds another clearance check, particularly with a deeper fireclay bowl. Our guide to using a garbage disposal with a fireclay sink covers compatibility, mounting, and the under-sink space you need to plan around.
Test for Leaks Before Filling the Cabinet
Do not test only by running the faucet for a few seconds.
Run the faucet first and inspect the supply and drain connections. Then fill the sink about half full and release the water so the drainage system is tested under a larger volume.
If a disposal is installed, test it according to its instructions and inspect the surrounding connections again.
A dry paper towel pressed around each joint can make a small leak easier to spot.

Is Replacement a Good Time to Change the Sink Layout?
Often, yes—but every layout change affects something else.
Double Bowl Sink to a Single Sink
Moving from a double bowl sink to a single sink gives you more uninterrupted room for large pots, baking sheets, and dishes.
It can also simplify part of the drain system.
However, the new outlet may be in a completely different position, so check the plumbing before assuming the existing trap can stay where it is.
Standard Sink to a Workstation Sink
A workstation model adds an integrated ledge that supports accessories over the bowl, allowing some prep and drying tasks to happen over the sink instead of on the counter.
This can be useful when counter space is limited.
But workstation function does not automatically mean the exterior shape will match your old sink. Compare the width, depth, apron, ledge construction, and drain position just as carefully as you would with any other replacement.
If you have already confirmed the cabinet and cutout can accommodate another fireclay apron-front model, NOZLOO's fireclay farmhouse sink collection lets you compare current replacement options before narrowing the choice by size, bowl layout, function, and apron design.
Stainless Farmhouse Sink to Fireclay
Replacing a stainless farmhouse sink with fireclay can substantially change the weight the cabinet needs to support.
Do not assume a frame built for a lighter stainless sink is automatically adequate for the new material. Check both the existing structure and the installation requirements for the replacement model.
Weight is only one difference between the two materials. Our fireclay vs. stainless steel sink comparison also looks at durability, maintenance, noise, appearance, and everyday kitchen use.
Smooth Apron to Fluted or Grooved Apron
Changing the apron design is usually easier than changing the overall sink size, but verify the physical apron dimensions.
A decorative front that is slightly wider, taller, or shaped differently at the edges can still require cabinet face modifications.
Can You Replace a Farmhouse Sink With an Undermount Sink?
Yes, but this is rarely a direct replacement.
A farmhouse sink requires an opening in the front of the cabinet for the apron. A conventional undermount sink normally sits entirely behind the cabinet face.
That means removing the farmhouse sink does not restore the wood that was previously cut away.
To switch from an apron front sink to a conventional undermount sink, you may need to:
- rebuild or replace part of the cabinet face;
- modify the face frame;
- change the support;
- modify or replace the countertop; and
- reposition the plumbing.
Whether the existing granite can be reused depends heavily on the original cutout.
If your main goal is simply to replace a damaged farmhouse sink without changing the rest of the kitchen, another compatible apron front model is usually the less disruptive path.
When Does Granite or Quartz Need Professional Modification?
Do not judge stone modification by sink width alone.
A fabricator needs to consider the entire cutout, including:
- the amount of stone remaining at the front;
- faucet-hole location;
- sink corner geometry;
- nearby seams;
- existing cracks or chips;
- edge polishing;
- sink support; and
- whether the stone can be safely modified in place.
Granite may sometimes be cut and polished to accept a larger sink, but that does not mean every existing slab can be altered safely.
Quartz creates similar fit concerns, and cutting either natural or engineered stone requires appropriate fabrication methods and dust controls.
If major stone cutting is required and the countertop is already worn or damaged, compare the modification cost with the cost of coordinating the sink with a new countertop.
Which Professional Do You Need?
Not every part of the job belongs to the same trade.
| Problem | Professional Typically Involved |
|---|---|
| Drain, P-trap, or disposal changes | Plumber |
| Granite or quartz cutout modification | Stone/countertop fabricator |
| Apron opening modification | Cabinet installer or carpenter |
| New or rebuilt support frame | Cabinet installer, carpenter, or qualified installer |
| New countertop templating | Countertop fabricator |
| Simple like-for-like sink installation | Experienced sink installer, contractor, or plumber depending on scope |
For a project that involves both stone cutting and cabinet changes, coordinate the order before anyone starts.
The countertop fabricator may need the physical sink, while the cabinet installer needs to know the final sink height and apron dimensions. Plumbing work normally comes after the sink is securely mounted.
How Much Does Replacing a Farmhouse Sink Cost?
There is no useful single price because the cost depends much more on the surrounding work than on the act of replacing the sink.
A relatively direct swap may involve:
- the new sink;
- removal of the old sink;
- minor support adjustment;
- sealing; and
- basic plumbing reconnection.
A more complicated project can add:
- granite or quartz fabrication;
- cabinet face changes;
- a rebuilt wood or plywood support frame;
- faucet changes;
- disposal relocation;
- drainage pipe changes; or
- a new countertop.
Once stone fabrication, cabinetry, and plumbing are all involved, what started as a sink replacement can become a small kitchen remodel and may cost several thousand dollars.
The sink itself is only one part of that budget. Our farmhouse sink price guide separates typical sink pricing from installation, cabinet work, countertop changes, and other costs that can affect the total project.
Farmhouse Sink Replacement Checklist
Before Buying the New Sink
- Measure the old sink.
- Measure the apron front.
- Measure the cabinet opening.
- Measure the countertop cutout.
- Check the corner shape and rim profile.
- Confirm the drain location.
- Check faucet clearance.
- Inspect available disposal space.
- Compare the new sink's actual dimensions and installation requirements.
Before Removing the Old Sink
- Take pictures of the existing installation.
- Clear the cabinet.
- Shut off the water.
- Protect the counter and cabinet edges.
- Plan how the sink will be lifted.
- Disconnect plumbing only after you know the replacement can work.
Before Installing the New Sink
- Inspect the cabinet for water damage.
- Check the face frame and apron opening.
- Repair damaged wood or plywood.
- Confirm the support frame is solid.
- Dry-fit the sink.
- Check the sink height and level.
- Check disposal and drain clearance.
- Confirm the countertop reveal or flush position.
Before Calling the Project Finished
- Seal the sink as specified by the manufacturer.
- Complete the mount and support.
- Reconnect plumbing.
- Reconnect the dishwasher if applicable.
- Test the faucet.
- Fill and drain the sink.
- Test the disposal.
- Check every connection for leaks.
Frequently Asked Questions
Can I replace a farmhouse sink without removing a granite countertop?
Yes, if the replacement fits the existing granite cutout, apron opening, and support system. If the new sink is larger or has a different corner shape or rim profile, a stone fabricator should evaluate whether the granite can be modified safely.
Does the new farmhouse sink need to be exactly the same size?
No, but a replacement with similar exterior dimensions, apron dimensions, and mounting requirements is usually easier to install. Nominal width alone is not enough to establish fit.
Can I replace a farmhouse sink with an undermount sink?
Yes, but expect more work than a normal sink swap. The existing cabinet face was cut for the farmhouse apron, and the countertop opening may also be incompatible with a conventional undermount sink. Cabinet and countertop reconstruction may be required.
Can I replace a double bowl sink with a single sink?
Usually, provided the new sink fits the countertop and cabinet. Expect the drain layout to change because a single sink will normally have one drain opening rather than the existing double-bowl arrangement.
Can I use a drop in farmhouse sink as a replacement?
Possibly. A drop in farmhouse sink has different countertop contact and mounting requirements from an undermount model. Compare the manufacturer's installation template with the existing cutout instead of relying on the advertised width.
Can I reuse my garbage disposal?
Often, yes. The disposal must work with the new drain connection and have enough clearance below the bowl. A deeper sink or different drain position may require the trap or drainage pipes to be rearranged.
Should I buy the sink before installing a new countertop?
Yes, when your fabricator or sink manufacturer recommends templating from the physical sink. Having the sink available before final countertop fabrication allows the installer to confirm the actual dimensions, corner shape, reveal, and faucet clearance before the stone is cut.
What is the biggest mistake when replacing a farmhouse sink?
Buying by nominal width alone.
A replacement must work with the countertop cutout, apron opening, cabinet, support frame, mounting method, plumbing, faucet clearance, and drain position—not simply match the number printed in the product title.
The Bottom Line
You can often replace a farmhouse sink without replacing the countertop, but only when the new sink works with the opening and structure that are already there.
Treat nominal size as a starting point, not proof of fit.
Measure the sink, apron, countertop cutout, cabinet opening, support, drain, and faucet clearance before removing anything. Dry-fit the new sink before applying sealant, and do not force a dimensional mismatch just to preserve the existing granite or cabinet.
If the replacement requires significant stone cutting, apron reconstruction, or plumbing relocation, it is no longer a simple sink swap. Knowing that before you order the sink gives you the chance to decide whether modifying the existing kitchen still makes sense—or whether a different replacement will save both cost and work.
Planning another part of the project? The kitchen sink guides cover farmhouse sink sizing, materials, installation, maintenance, common problems, and buying decisions.